Setting up your own mail server is something that most IT folks should know how to do. It can benefit you to host your own mail server so that you can have complete control over your email addresses and email accounts. There are several products that you can purchase to do this for you such as Microsoft Exchange Server, Sendmail, FastMail.FM, and many others.
The point of this article is to setup your own email server on Windows Server 2003 in a short amount of time and for free. I have been trying to setup my own mail server for the longest time and have always been able to receive mail but could never get it work from my home office. After about a year of trying and reading through endless blogs and newsites I have finally figured it out. There have been many articles out there claiming to show you how to setup a mail server but they all come up short. I will give you all the information you need to get started in about 15 minutes.


[Step 1: Install Windows Server 2003]
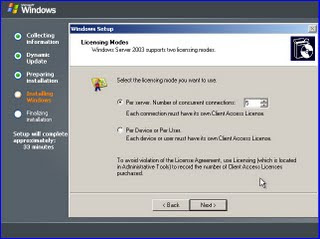
Setup the Windows Server with all the defaults and click the installation wizard until you are done. Once you are done installing the server, you need to add Email Services (POP, SMTP) to the server. This option is not installed by default when you first install Windows Server 2003.
[Step 2: Enable email services on the server]
To enable "Email Services" on the server you need to open up the Manage Your Server screen from the start menu. Click on the Mail Server option and click next.

Once you are here, you will be able to install SMTP service for sending and receiving mail and the POP3 service for allowing clients to connect and download their mail with an email client. Click through the next screen and accept the defaults. Once you receive the window that tells you the server is now a "Mail Server", click complete/finish and close the diaglog. The next part will talk about the configuration of the Mail Server. There are two parts to setting up the mail server, the first being the POP3 component, and the second being the SMTP component.
[Step 3: Setting Up/Configuring the POP3 component]
Now that you have the POP3 component installed, you need to setup a mail domain. The domain can be anything you want but must be a domain that must be configured in your MX record.

Once you get to this screen, go ahead and create a domain. (yourdomain.com, your domain.net, etc.) After you create the domain go ahead and create a test mailbox under that domain.

Create the email account and setup a password. This user will be added to the "Email User" group on the server and will only have permissions to access to the POP3 service and the SMTP service. For setting up the POP3 service that is all that is needed unless you need to change your InBound email port which is by default 110. If you need to change this for any reason, in the POP3 Managment window, click on properties of mail server and change the port number in the diaglog window. That is all that is needed for the POP3 service component.
[Step 4: Setting Up/Configuring the SMTP Component]
This part requires that majority of the time spent on setting up the mail server to work properly. First, we need to make sure that SMTP service is installed and is running. On the server , click Start > Adminstrative Tools > IIS Manager. Once you are here click on + on the server and make sure you can see the Default SMTP Virtual Server node.

Here is where the majority of the configurations go wrong. Make sure you follow the directions listed below. Right click on the properties of this and you will see a dialog that will have several tabs on it. I am going to explain each tab and the properties that need to be set in order to get your mail server working properly.
[Tab 1: General]
- The only setting you need to check is the port number that will be used for sending and receiving email. In the dialog, will be able to specify an IP address that will be used for the email or you can leave it as [All Unassigned]. Leave this as the default and click properties. In this dialog, you can change the port number for the SMTP server. I would recommend using 25 but if you want to use another common mail port you can change it here. In some cases, most ISPs block port 25, but check with your ISP and find out if they block port 25. If so, you may need to change this number here to 587 or another port number that they don't block.
[Tab 2: Access]
- Under access control, click details and make sure you have Anonymous Access and Windows Integrated Authentication checked.
- Under Relay Restrictions, click detail and make sure the "All Except the list below" is selected. You will still be secure by doing this in that only users who were authenticated can access and relay email through this mail server. You don't want your server being used for SPAM!
[Tab 3: Messages]
- Here you can specify the max mail message size and where bad mail will go.
[Tab 4: Delivery]
- Here you can specify the outbound message info. You want to make sure under "Outbound Security" that you have "Anonymous Access" selected only.
- Under outbound connections, you need to make sure the correct port is set based off the initial port we specified back on the properties of the SMTP server above.
- Click Advanced, then here you need to specify the fully-qualified-domain-name of your domain. (YourDomain.com). Whichever you used when you created the mail domain for the POP3 component.
- Still under Advanced , you will need to configure a smart host if your ISP blocks your IP address from sending mail over the internet. My ISP offers a free relay for SMTP/POP access , so I contacted my ISP's website and obtained the server names and placed the smtp ip/domain in the smart host field. If you forget this, the email will never be sent if you are using a Dyanmic IP address or are on a email blocklist/blacklist.
[Tab 5: LDAP]
- Skip this
[Tab 6: Security]
- This lists the user groups able to access/modify the SMTP server
Now that we have the SMTP component configured we can start testing our configurations and sending some emails. The first thing I start with to test is using the command line and telnet.
Click Start> Run> Enter "cmd.exe" and the command prompt opens. You will need to do this from the server computer and from another client computer that can access your mail server. Make sure if you mess up when typing , don't use backspaces because the mail server expects the exact amount of characters and will not work so be sure you enter the info correctly with no mistakes. If you mess up tho, no worry, just start the process over. Be careful when you type!
- Type cd\, then you should have C:\ prompt, then type - "telnet yourdomain.com [portNumberYouUsedInSMTPproperties]
- If you connected successfully, you should get a response back from the mail server that tells you the name, date, and other relevant info in the command prompt.
- Then type , "helo", this will make sure you can communicate with the mail server.
- Then type "mail from: yourMailBox@yourDomain.com" and click enter
- Then type "rcpt to:yourMailBox@yourDomain.com" and click enter
- Then type "data" and click enter
- Then type "A Test Message" then click enter
- Then type "subject: A test message" and click enter"
- Then type "body: This is test message" and click enter"
- Finally, click "." and click enter, if you did this correctly, you will see a response from mail server that says, "Email Queued for Delivery"
- Close the command window.
The first test is to check your POP3 service and see if the mail was successfully delivered to the email address you specified above. If you have a message count under that mailbox of 1 then you know it worked. The next test would be to do the same thing from another client computer that can connect to this mail server. Another test would be to send an email to an address outside of your domain. This problaly will not work because 99% of ISPs will have your dynamic IP address on a blocklist/blacklist. I will talk about this next on how to get around this.
[Step 5: Getting Around the BlockList/BlackList Issue]
[Only do this if you can't configure a smart host]
As mentioned before, all ISPs block dynamic ip addresses from sending mail because of the heavy use of spam on the internet. This is a good thing for all the users out there that actually are good internet citizens. What you will need to do is go to http://www.spamhaus.org/
Once you are here, enter your IP address into the IP address checker on the left side of the site. Once you run this , you will end up on one of the lists, click on the link provided, and follow the directions. Since your server is already setup and active, you can request to be removed from the blocklist\blacklist. Just follow the link that they provide after you input your IP address. It should take about 24-48 hours to process your request and after just check to make sure your IP is not on the blocklist\blacklist anymore and you start sending and receiving emails.
If all of the tests worked and you are not on a blocklist\blacklist anymore, all you need to do is configure your client mail programs, which should be pretty straighte forward.
[Step 6: Setting Up Client Email Program]
For this section, you have many options. You can use the default OutLook Express, Microsoft Office Outlook, Mozilla ThunderBird, and several other products that allow you to manage your email from a client computer. The simple and most easiest to use is Outlook Express.
Setting up an account is pretty simple. The first time you run Outlook Express, you will be prompted to setup and account. Follow these steps:
- Add new Email Account (POP3)
- In the wizard, enter your name for your account , this can be anything you want so you can reference later.
- Next enter your email address in the email address field.
- In the Incoming Mail Server: pop.YourDomain.com
- In the Outgoing Mail Server: smtp.YourDomain.com
- In the Account Name: YourMailBoxName@YourDomain.com
- In the password Field: password used to setup the mailbox from before
- [Optional] If you changed the ports from when you setup the original SMTP server you will need to change that here too. Click on "More Settings" or "Manually Setup Account"
- You need to make sure that for your incoming mail that you specify port 110 and for outgoing email you specify your SMTP port number. Remember that if you don't set this up correctly your email will never work.
- Once you have completed this section, click on the "Finish" button and if everything was setup correctly you should be able to connect to your mailbox and see your test message that you sent to yourself from before.
- The last test is to try to send an email to an outside domain email and then send an email from an outbound domain to your domain and verify that it works.
[Wrap Up/Conculsion]
If you followed my post, you should be sending and receiving emails like a champion! There was a good deal of information in this post and like always if you have any questions or concerns about it, feel free to leave a comment here on my blog.
Good luck and happy emailing!